Friday, August 10, 2012

Friday Finds

Since, fall is just around the corner and L is starting to outgrow his 12 month clothes it seemed like the perfect time to do a little shopping. This week there were two consignment sales in our area. The first one was held at my favorite consignment shop. The second is held by a company that holds these sales twice a year. The later is a serious sale...I mean people come armed with rolling trash bins to hold their finds while they shop. The sale room is over 10,000 sq feet. It's serious!

I hit up both of these sales looking to build a base for a fall and winter wardrobe for L. In addition to these sales I also got a few pieces from Goodwill. We literally had only 2 or 3 pieces in sz 18 months for him. I wound up with more than 30 pieces and I did not pay more than $5.00 for anyone piece. Every piece is either brand new with tags or in excellent condition. These are the brands that I purchased.

Children's Place
Gymboree
Baby Gap
Polo
Adidas
Carters
Old Navy
OshKosh
Converse
Jumping Bean's (Kohl's)
Okie Dokie (Penny's)
Circo (Target)
Garanimals and Faded Glory (Walmart)
Disney
Sesame Street

Take a look at what I found.

OshKosh denim jacket ($4.75) - retails at $20
GoodLad Peacoat (5.00) -  retails for $28
Children's Place fleece pullover ($1.50) - retails for $20-$24

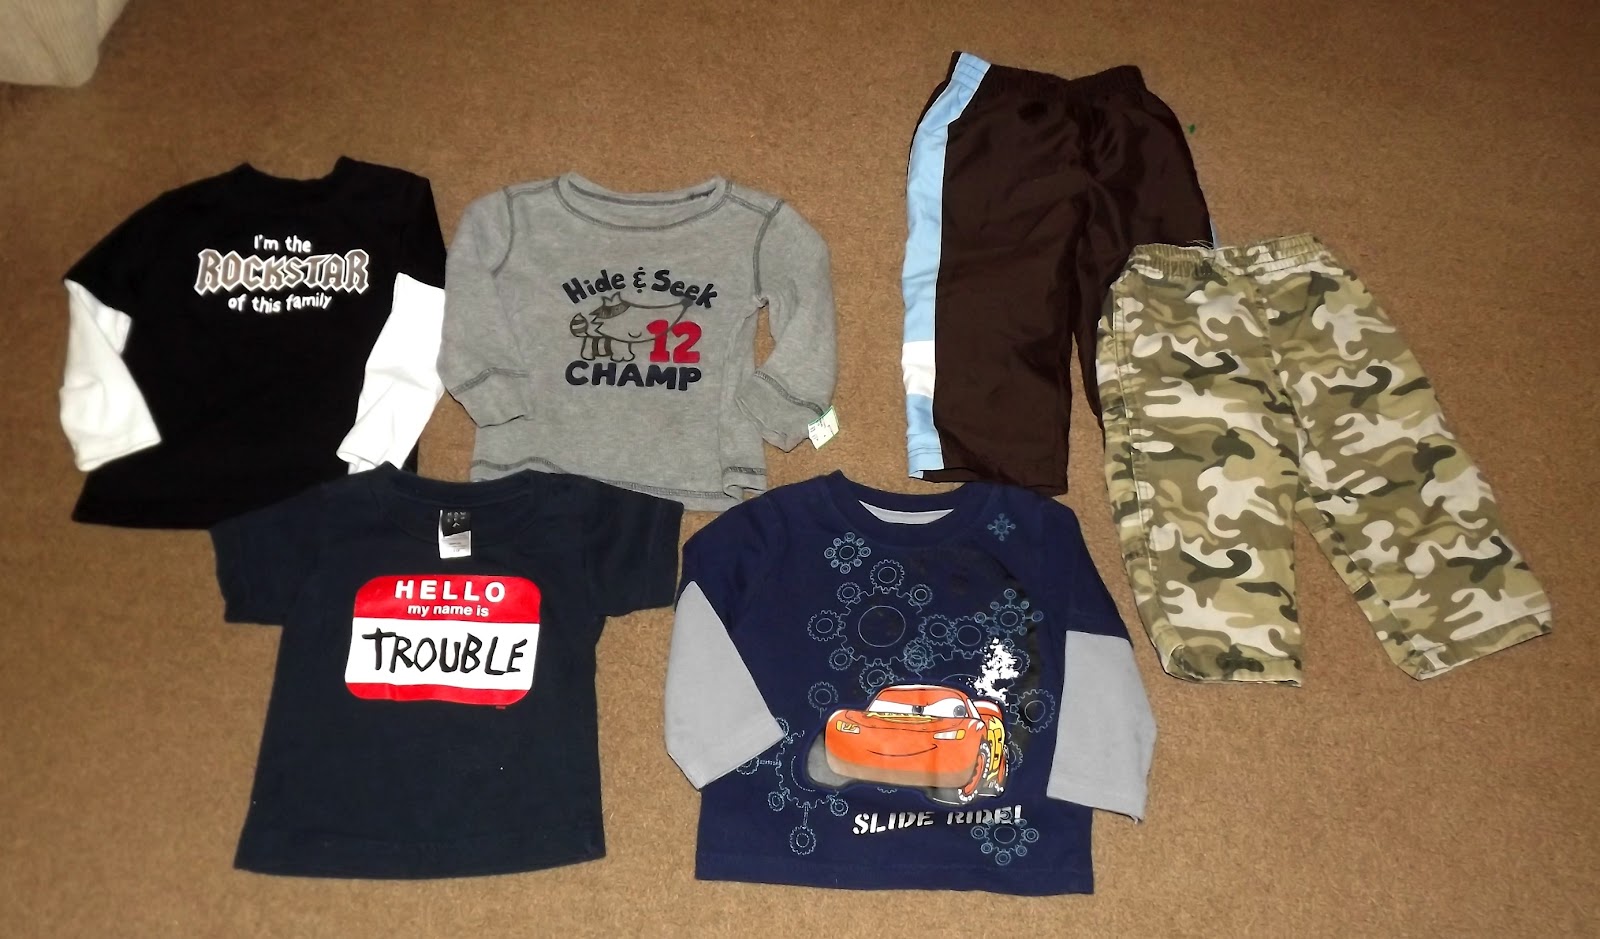
Okay, this is where things get a little fuzzy as to what I paid for what. I wound up with 10 complete outfits. Some of them came together, some of them I pieced together myself.


2 Carters outfits (3.25 each) - retail for $18.00 each
8 various brand shirts (1.50 -3.25 each) - retails for $8.00 - $25.00 each
2 pair of jeans (1.50 each) - retails for $15.00 - $35.00 each (one pair is Polo)
2 pairs of Old Navy cargo pants ($1.50 each) - retails for $16.00 each
1 Adidas Jacket ($1.50) - retails for $40.00
4 pairs of athletic pants various brands ($1.50 - $3.00 each) - retails for $4.00 - $10.00 each

I also bought a few pieces that we either already had something to go with them or that could be matched to pieces in the above photo.


4 various brand shirts ($1.50 - $3.25 each) - Retail for $5.00 - $12.00 each
2 pants various brands ($1.50 each) - Retails for $6.00 - $10.00 each

I also found two cute items for Halloween.


Faded Glory pajamas(2.75) - retails for $9.00
1 shirt (2.50) - retails for $5.00

I also got 2 pairs of shoes


1 Longhorn pair from Payless(1.00) - retails for 12.99
1 pair of Converse (6.98) - retails for about $30.00

(The Converse shoes were the only item I paid more than $5.00 for)

All in all here is the breakdown

Baby Consignment #1 - spent $44.00 but...I had a $37.00 credit so technically I only spent $7.00
Consignment Sale #2 - spent $23.00
Goodwill - spent $15.00

So the grand total that I spent was $45.00 and I saved...well, hundreds!

Happy Shopping!

Saturday, July 14, 2012

Refashioned button down

I am finally back!!!
We have been SUPER busy this summer but I finally managed to show some of what I have been working on. I found this button down shirt at Goodwill and loved it but, I did not need another long sleeve button down. So...I cut it up! The shirt is New York and Company and looked brand new! I am not sure it had ever been worn, it looked that good.
It is a beautiful ivory with thin gold metallic pin stripes in it.
 The first thing I did was cut off the sleeves and the collar. I pinned in my new neckline and added 1" seam allowance and cut there. At the time I wasn't sure what I was going to do with the neckline so, I kept that 1" allowance to have room for whatever I decided. It is difficult to see the neckline in this photo, there is a better shot of it later on.
Once I had the sleeve off, I split them open. I decided to change the sleeves into a tulip sleeve. I made a pattern for the sleeve (please ignore my random lines on the pattern) with 1/2" allowance to hem the sleeves.

I then flipped the pattern over to get the other side of the sleeve.
 Here are the 2 sleeves sewn together with the hem sewn in.
I attached the sleeve back in and finished out the arm holes.
With the rest of the sleeve fabric I cut 1 1/2" wide strips. I then sewed those together, folded them in half and pressed. I also finished out both ends.
I then folded and pleated the fabric and stitched the pleats in place. The left side has been sewn down the right side is still pinned in. Halfway through I turned my pleats in the opposite direction so the would be going the same direction on both sides.
Once I sewed the new neckline trim in (pointing down), I trimmed out the excess seam allowance, turns out I didn't need it
I then finished out the seams with lace seam binding and turned the ruffle up and top stitched it to keep it down.
Here is what it looks like. I think it turned out pretty darn cute. I can't wait to wear it under my red blazer. I am only sorry I didn't get a side pic of the sleeve.

Friday, June 22, 2012

Skirting the Issue

No, I have not fallen off the face of the earth...the end of May and beginning of June was just overwhelmingly busy for me. That being said I have new things I will be posting shortly once I get some of my other things in order (like the mounds of laundry sitting in my bedroom) Until then I have something I want to share.

I came across this while blog browsing and I think it is SUPER cool! Click the link to read more about it!

Simple Simon and Co

I totally plan to participate and I plan to post my creation(s) on here for all to see. You can also access it by the button on my side bar.

See you Soon

Wednesday, May 16, 2012

30 Minute Makeover: Skull Baby Shoes

I saw these adorable little shoes on kiditude.com and fell in love but, there was no way I was paying $25 for shoes that L will out grow in a month.


I found these little shoes at my local Wally World for $5


I had this fabric pen that I had purchased about a month ago for another project. You can find them at your local craft store in a variety of colors for about $3 each.


A little sketch and 30 minutes later (actually more like 20) I had these. You can use a black sharpie to clean  up any stray white marks or to define the eyes and nose.


Total savings = $20

Tuesday, May 1, 2012

Refashion: High waist pants to low waist shorts


So, I am super excited for my first refashioned post. It took me a little longer than expected because I have been so darn busy. Let me also apologize for the terrible flash photography. Most of this is done late at night once my sweet pea is in bed. Nonetheless, here we go...let the refashioning begin!

Two big trends this spring are tailored shorts and bright colored bottoms. I was looking for both when I came across these raspberry colored pants at a local thrift store. They were brand new Ralph Lauren golf pants with the tags still attached (I don't know who originally paid $90 for these but lets just be glad they had enough sense to donate them and not wear them) I loved the color and the fabric was fantastic and they were only $3.50. As you can see by the below photo however, the fit was horrific! A mom jean fit at its worst. I am not a big gal by any means and these pants manage to add 10 lbs and a pooch to my belly!


The first thing I did was to remove the ridiculously high waist band and took out the darts in the back to take out the mom jean curve. Then I cut the legs off just above the knee. (Save everything you take off you will reuse it)


Once I determined where I wanted the new waistband to sit. Opened up the back seam of the waist band and then pinned it on at the new waist seam to see how much fabric I needed to extend the waistband.


I made a pattern, based on the original waistband and added 1/2" seam allowance. I used the leftover leg fabric to make the waistband addition.


First sew the new side seams on both the front and the back of the waistband and then sew them together at the top. Top stitch your seam allowance on the inside. The inside of the waistband should be slightly longer than the outside


Here I marked with pins where I wanted my new waistband seam to be and then I measured up 1/2" and marked with pins again (this is your cut line) You cannot tell by the picture but I made the waist about 2" lower.


Once the waist is cut, pin the outside of the waistband to the outside of the short and stitch at the original seam.


Fold waistband back over and stitch in the ditch to attach the waistband liner.


View from the inside after the you stitch in the ditch.


After the waistband is attached I used a blind hem to shorten them to the desired length.

 Here is the finished product. I think they turned out pretty good. I wish I had taken a pic of the new lower waist but sadly I forgot. I almost didn't have time to take this one. The hubby liked them as well...he gave them 2 thumbs up. They are going to be a great pair of shorts for the summer!

Saturday, April 14, 2012

Beginnings

I have thought about starting this blog for about 6 months. Having a child under a year old slowed the process down a little for me. Now, I am ready to roll so, let's do this.

I love thrifting, I love sewing and I love fashion. My pocketbook is not large and has gotten progressively smaller since the birth of my son, L, so shopping has taken a backseat. Or should I say shopping at full price, for myself, has taken a backseat. Which is why thrifting has made its way up my list of hobbies over the past year. Since I am a seamstress by trade I often buy things that don't fit because I can get them for a good price and alter it to fit me. I have recently found a love for refashioning. This is where the idea for the blog came about.

First, I hope to share with you not only what I find in thrift stores but also what I find first hand on saleand how I do it. Second I want to share with you my sewing skills and how-to's for what I alter and refashion. Throw in a little fashion fun and we have a blog...or at least I hope I do.

  I am not looking to refashion my husband's old golf sweater into a skirt or anything of the sort. (Not that I have anything against those that do, it's just not for me.) So, if that's what you are looking for you might not be to interested in what I have to say.  I am more interested in taking what I find and molding it into the current seasons trends. Taking something you might normally overlook and making it fashionable. I might also point out that I am not the writer so please forgive my grammatical errors and run-on sentences. All I want to show you is how to take the cheap and turn it into the chic!

My first how-to post will be soon! So keep an eye out!